|
|
||
| Date | Event | |
|
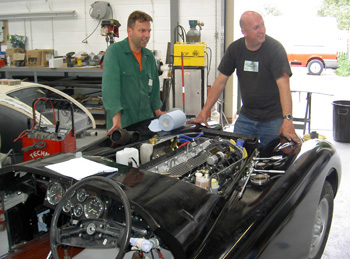
13/06/2007 24hrs Engine commissioning
|
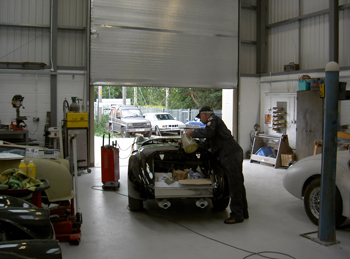
It lives, breathes and moves under it's own power., but not without a struggle. I got the call from Simon last week that the bell housing was back and that the gearbox should be refitted in time to commission the engine yesterday (Tuesday). I got to Creech in time to see Chris put the final touches to the refit, fitting the transmission tunnel. I filled the tank with Petrol checked around and there were no leaks. So far so good. Filled the radiator with water (NB water only, just in case we had a problem and had to drain it down again). Prudence paid off because we immediately found two pin hole leaks in the radiator. At some stage the radiator must have damaged, I can't remember how or when. It means the radiator must be taken out again for repair. However we decided to press on with commissioning the engine and get the repair done afterwards. We pressed some mastic in to the radiator core and this stemmed the flow sufficiently for us to continue. |
|
|
|
We switched on the ignition and the fuel pump ran. Even though the fuel lines were now under pressure there were still no leaks. Turned the key further to see if it would start. The engine turned over, ran for about 10 specs and stopped. This fault remained with us despite checking electrics, wiring fuel lines and various components throughout the system. During checks on the fuel relays we found that one of the relays did not have a 12v supply. We rigged a temporary supply and tried again. |
|
|
|
||
|
I arrived at Taunton about 11:00 a.m. today to be greeted
by the noise of the engine still struggling to turn over. and fire
consistently. Simon had Chris had used the bulb trick and found out we
had power to each injector but only the two centre ones were working.
Chris had said yesterday that sometimes the injectors stick and tapping them
whilst turning the engine over shocks them in to working. We had tried
this but without success. We took a couple of injectors that we knew
were not working and continued to tap them whilst cranking the engine but to
no avail. I phone HGL, the company that had refurbished the injectors
last September, they confirmed that sticking was the most likely cause
and to continue tapping on the body of the injector. After much
tapping we noticed the the two injectors we had taken out were beginning to
show signs of weeping fuel at the pintle valves. We refitted them and tried
to start the engine again. It was running better but not right. more tapping
and the more we ran it the better it got. We now seemed to have 4
cylinders out of 6 running. The final two were persuaded with a long steel
bar resting on the injector and gently tapped with hammer. Gradually
the engine running improved until all 6 cylinders were firing. We were
not out of the wood yet, the engine would not idle. We had debated
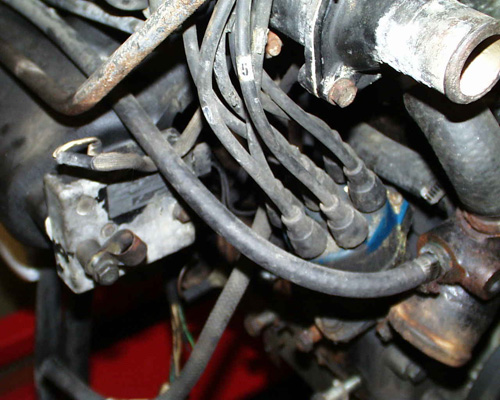
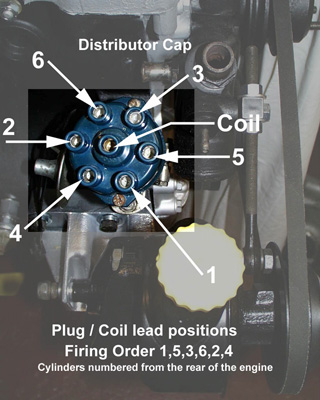
during the misfire phase about engine timing. I had taken photographs before
and after I fitted the new distributor cap and HT leads, to make sure I
refitted them exactly as the originals. The problem was the ht wiring
to the distributor cap was exactly 180 degrees out from the Haynes Manual
and in comparison with two other 120's, but the same as a 140, that were n
the workshop. To prove that the static timing was right we removed all
the plugs and put the car in to 4th gear. Pushed the car forward until the
No6 piston (the front one was on its compression stroke (checked buy placing
a thumb over the plug hole and feeling the pressure build up). We continued
moving the cat until the 8 BTDC mark on the flywheel pulley was aligned with
the pointer on the crank case. We then removed the distributor cap an noted
where the rotor arm was pointing. It was pointing at the n06 contact and so
was correct. We surmise (without taking the distributor out) that the
distributor can be fitted 180 degrees out but that his doesn't matter
because, the distributor is symmetrical, and it is just a case of plugging
the leads in the correct firing order. The static timing was OK |
||
|
|
||
|
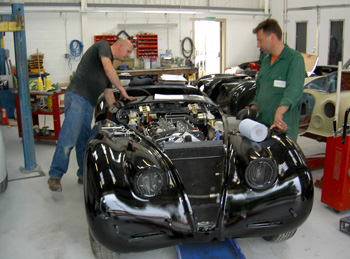
Much checking of air flow meters and other air elated
components when we noticed that I had forgotten to connect the pipe
from the aux air valve to the plenum. It was struggle to connect but we
did it. As soon as we tried it the engine ran perfectly. We let it
warm up and adjusted the idle speed. All the gauges read correctly
except the coolant temperature gauge appears to be over reading.
Both Chris and Simon remarked on what a good engine it was, even though it
was a struggle to get it going. There are no fuel oil or coolant
leaks. The engine is quiet with no tappet noise, very smooth and
responsive to the throttle. To end the day we engaged the gears
and gently tested each one. I happy to say all gears were present and the
car moved under it's own power. |
||
|
|
||
|
22/06/2007 Engine
|
To see and hear the Black Cat purring
|
|
|
25/06/2007 1 hr Instruments & Electrics |
The water temperature gauge on the XJ6 indicated the
engine was overheating when the engine was last run before dismantling.
The gauge was replaced with new a new gauge from the Smiths Classic Range.
During the engine commissioning the new gauge reached an indicated
temperature of 140 °C. Clearly this wasn't the case because the
water in the header tank was not boiling. First suspect was the
temperature sender. The original XJ6 one was still fitted in the water rail.
To replace the temperature sensor you have two choices, a replacement XJ6
part or a part that matches the gauge from Speedy Cables (suppliers of
Smiths Instruments). There shouldn't be a difference between the two but to
be on the safe side I ordered the one to match the new gauge and a 5/8 UNF
(M) to 1/8 NPT (F). During the conversation with Speedy cables the subject
of voltage stabilisation came up. The Fuel, Water Temperature gauges &
Oil Temperature gauge (if fitted) need to have their supply voltage
stabilised to 10V. At this point the penny dropped. I had not fitted the XJ6
voltage stabiliser and in any case, given the original temperature fault ,
it was probably faulty. I've added a new voltage stabiliser to the order and
confidently expect that this and the new sensor will fix the problem. |
|
|
Total hours this Month = 25 hrs
|
Total hours
to date
|
|
 |
 |
|